
- Key Takeaways
- The Unforgiving Alberta Winter
- Your Essential Winter Site Setup
- Powering Through The Cold
- Protecting Your People
- The Bundled Rental Advantage
- Proactive Winter Maintenance
- Conclusion
- Frequently Asked Questions
- What is a winter site setup and why is it important?
- What are the essential components of a winter site setup in Alberta?
- How can I keep power systems reliable in extreme cold?
- How does winter site setup help protect workers?
- What are the advantages of using bundled winter rental solutions?
- How often should I perform winter maintenance on a jobsite?
- How early should I plan my winter site setup?
Key Takeaways
- Prepare for extreme cold, blizzards, less daylight and frozen access roads so you can work safely and with minimal disruptions. Factor in weather delays and allow extra time beyond what you think is necessary for schedules and logistics.
- Identify your critical winter equipment in advance, including generators, light towers, heated trailers, and fuel storage. Utilize a bundled rental approach to ease delivery, setup, support, and invoicing.
- Plan a site setup that shields crew members from the wind, facilitates snow clearing, and maintains heated tents, lighting, and emergency access near the work areas. Utilize diagrams and checklists to verify the layout prior to mobilizing.
- Prepare tough power, lighting, and heating with weather-rated gear, distinct distribution and lighting plans, and insulated structures. Check performance routinely and have spares, fuel, and tools on hand to avoid unforeseen shutdowns.
- Safeguard employees with winter PPE requirements, heated shelters, warm-up breaks and cold stress, slip and equipment-related emergency plans. Conduct training and drills routinely so that everyone on site knows what to do.
- Be proactive in your winter maintenance routine. Make frequent inspections, clear snow and ice, manage fuel, and keep maintenance logs. Use this information to fine-tune your setup and increase reliability through the winter.
===
Winter site setup is preparing a worksite or outdoor space to remain safe, stable, and productive in cold weather. A good setup commonly includes ground prep, snow and ice control, safe walkways, weather-rated shelters, and power, heat, and lighting arrangements. A lot of teams map out gear storage, drainage, and truck/worker access for when snow accumulates or the ground goes slick. A little winter site planning goes a long way toward limiting delays, preventing accidents, and shielding tools and materials from the elements. In the subsections, the guide strolls through crucial steps, frequent hazards, and straightforward audits you can utilize to keep a site operating through winter conditions minus guesswork or hurried patches.
The Unforgiving Alberta Winter
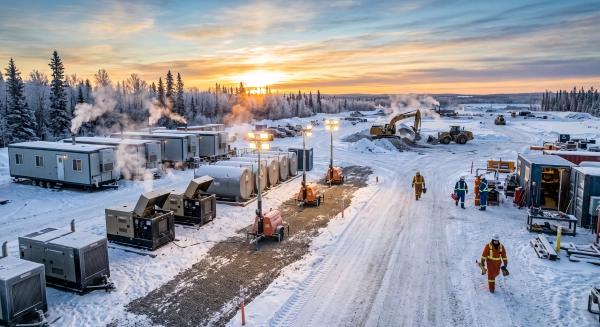
Alberta’s winter dictates how any site operates, from a mini camp to a giant project. Sub-zero days, high wind, and blowing snow make different what is safe, what is practical, and how fast work can move. Setup has to assume the season will be harsh, not mild.
Sub zero temperatures and blizzards can close down work if your plans are feeble. When air dips well below 0°C, short jobs seem to extend, tools are hard to hold, and everyone operates in slow motion. Frostbite and hypothermia are very real if workers or campers aren’t dry, well fed, and layered. A four-part clothing system is standard in this kind of cold: a moisture-wicking base layer, a warm mid layer, a thicker insulating layer like fleece or down, and a wind-resistant, waterproof shell. On a winter camping site or a remote work camp, that same logic shapes shelter: windbreaks, solid tent or trailer tie-downs, and clear paths for snow removal. Storms can bury gear, collapse light shelters, and erase tracks, so critical items—fuel, first-aid kits, emergency heat—require assigned locations and obvious markings.
My reality, Alberta’s unforgiving winter with its short days means less natural light and more work done in dim or full dark. Site layouts should expect late sunrises and early sunsets, with major activities forced into the sunniest hours. That hits a construction site and a winter campground. You schedule heavy lifts, vehicle moves, or extended hikes during daylight and reserve evenings for lighter tasks, upkeep, or sleep. Permanent LED towers, headlamps, and backup lights must illuminate walkways, access roads, and high-risk areas such as fuel storage or steep slopes. Winter nights are long, so stowing books, cards, or easy games does wonders to keep folks awake and happy in the off-hours.
Extreme cold increases the risk of equipment breakdowns and safety hazards. Fuel gels, batteries die quick, seals dry out and crack, and plastic components become brittle and break. Routinely cold-weather checks—battery blankets, proper winter oil, block heaters, and test runs in low temperatures—help keep trucks, generators, and stoves primed. On a winter campsite, that could translate to a back-up stove, a second ignition source, and additional fuel kept where it remains dry and accessible. On bigger properties, it means extra hoses, filters, and essential components stored in warmed rooms. Safe pathways require grit or sand, and employees require definitive criteria on when to halt work due to wind chill or whiteout conditions.
Snow and ice impede humans and supplies. Planning for logistical delays is part of any winter setup:
- Factor additional time into delivery schedules for snow-laden or icy roads.
- Pre-stock key supplies: fuel, food, de-icer, medical items, before the coldest months.
- Plan alternate access routes in the event that one road drifts shut or ices over.
- Get snow removal for parking, access roads, and your tent or trailer pad.
- Put the site itself on somewhat elevated ground with natural wind shelter to minimize drifting and facilitate snow plowing.
- Select travel routes and working locations that steer clear of avalanche chutes, weak ice, and steep shaded slopes.
- Employ markers and flags that remain visible in heavy snow and twilight.
It’s Alberta’s winter that pulls people outdoors again for skiing, snowboarding, snowshoeing, and ice walks in Banff and Jasper parks or winter camping in the open campgrounds across the province. Sites adjacent to frozen lakes, like Lake Louise, or frozen canyons, such as Maligne Canyon, require strict safety protocols for cold and ice navigation, but they provide the dramatic landscapes that so many are drawn to. Specific advice on where to camp to shelter from the wind, keep warm and dry, and move on ice makes those trips safe and memorable.
Your Essential Winter Site Setup
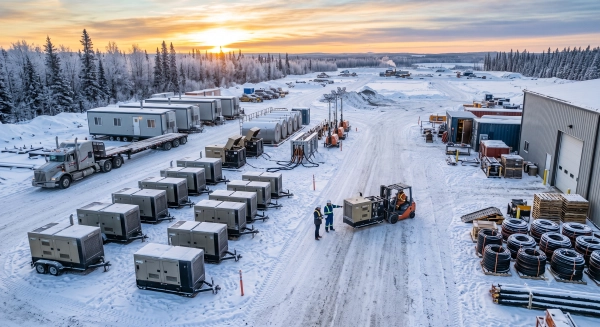
Bundling rentals reduces delays and finger-pointing when the weather shifts. One supplier for generators, light towers, heated trailers and fuel storage can match capacities, cable types and connectors right from the beginning. Request equipment rated for sub-zero operation, complete with cold-start kits, winter fuel and weatherproof controls. Build a shared winterization checklist that covers each asset: fuel type, oil grade, snow clearance zone, required clearances from tents, cook stoves, and any camp-style shelters like quinzhees or hot tents.
A simple pre‑mobilization checklist keeps things organized:
- Site layout finalized, with wind direction and safe distance of at least 60 meters from watercourses and flood-prone ground.
- Power plan with load calculations, labeled circuits, and a map.
- Have your lighting and heating locations marked. Everything from warm-up shelters to trailer offices.
- Fuel storage inspected, spill kits placed, and staff trained.
- Personal gear standards set: layered clothing, dry base layers, sleeping bags rated at least 5 to 10 degrees Celsius below forecast lows, liners, and first aid kits.
Add small but high-impact items: water stored upside down so caps do not freeze first, clear rules on not sweating through work clothes, and easy access to hot drinks and simple food from a safe cook stove area. Consider this checklist a living document and tweak it following every storm or night shift.
1. Strategic Layout
Consider all the comings and goings between work areas, heaths, and sheds. Locate heated trailers, hot tents, or main warm-up spots on the shortest line between high-use areas so no one tramps long distances through wind or ice. Attempt to protect these walks with buildings, snow walls, or stacked materials, and maintain them sufficiently wide for two-way pedestrian traffic without anyone having to trudge through deep snow.
Consider worker exposure for every layout decision. Lay-down areas, mobile offices, and first aid stations should sit near active work but not in blast zones, swing radiuses, or under loads. For overnight sites or winter camps, group sleeping tents or quinzhees in a protected cluster away from generator noise and downwind from exhaust and cooking areas, which benefits both rest and air quality.
Designate space for snow removal from the start. Place heavy equipment, fuel cisterns and generators where loaders and plows can access them even after significant snowfall. Designate emergency paths for ambulances and fire trucks, and maintain them free of stacked goods, parked vehicles or drift zones. For camp-style setups, that means obvious routes between tents, latrines, cook stoves and first aid kits, all indicated with poles or flags that stand taller than anticipated snow levels.
Map key paths before gear arrives. Draw pathways from gates to faces, from faces to warm tents, and on to latrines, fuel, and medical. Identify where the ice forms, where wind whips between buildings, and where snow will slip off roofs. This map should be legible, large format, and updated as you move trailers or open new work faces.
2. Power Distribution
Begin with numbers. Include power draw for heaters, light towers, tools, pumps, trailers, and any camp systems like tent heaters or battery chargers. Start-up surges for motors multiply your running wattage. Put in a buffer, usually 20 to 30 percent, so generators aren’t running hot in the bitter cold when efficiency dips and cables harden. For mixed sites with field crews and a winter camp, isolate critical loads such as medical fridges, communications, and basic lighting on their own circuits.
Cold, wet weather is tough on cables. Utilize weatherproof, outdoor-rated cords and insulated connectors which remain pliable below freezing. Elevated cable runs on mats or cable ramps assist in distancing them from meltwater and slush. Wrap junctions and plugs so they stay dry and visible, not under snow piles. Any plug-in heaters in trailers, tents, or hot shelters should attach to dedicated circuits with obvious load restrictions.
Keep generators central yet safe. Put them where refueling is rapid from primary fuel tanks and where your maintenance crews can get to them even in a storm. Keep sufficient distance from sleeping areas and enclosed shelters to minimize noise and exhaust while adhering to local regulations and manufacturers’ clearances. Wind protection can be provided by barriers or small sheds, but ventilation should be kept open to prevent exhaust build-up or overheating.
Label every circuit and document it on an easy to reference distribution map. On that map, indicate which generator powers which trailers, heaters, and light towers and where the breakers are located. In a power fault or winter storm, crews can cut or test the right line without guesswork. Keep both paper copies in primary shelters and digital copies remote teams can access if on-site personnel require assistance.
3. Lighting Placement
Bad light means real danger on snow and ice. Put light towers on every entry point, major work area, fuel depot, and route to warm shelters. Aim for steady, even light along routes that people use most in the dark: from parking to check-in, from check-in to work, and from work back to warm-up areas or winter sleeping spots. In camp-style layouts, employ gentle yet reliable illumination in the vicinity of tents or quinzhees to allow safe travel post-sunset without blinding glare.
Help your panels work smarter, not harder. Adjust tower height and beam angles to reduce glare on snow and ice. Aim point lights slightly down and overlap beams so you don’t have dark pockets behind equipment, stacks, or site cabins. Walk the site at night after you’re set up. Keep an eye out for shadowed steps and uneven ground, guy lines or tent stakes that disappear in the contrast and move lights accordingly. Use some lower-level lighting, such as bollards or string lights, for paths where high beams cast sharp shadows.
Ice, snow and frost gradually obstruct lenses. Integrate light check-ups into daily routines, with rapid inspections at shift start and finish. Remove snow caps from towers, brush off lenses and test that masts still lock tightly into position. If storms are predicted, arrange a quick check immediately after the weather subsides prior to resuming all-out work.
A straightforward lighting diagram backs up all of this. On one sheet, display tower locations, coverage areas and power feeds. Identify high-risk locations such as fuel storage, steep ramps and water edges that require additional lighting. This diagram assists re-setting towers after they’re moved for snow plows or crane work.
4. Heating Solutions
Heating for both you and your buildings. Deploy heated trailers or hot tents as primary warm-up areas and offices, located near work zones but removed from heavy traffic or falling ice. For crews that bunk down, four-season tents, quinzhees, or other insulated shelters can suffice if coupled with rated sleeping bags and liners. Pick bags that hit around 5 to 10 degrees Celsius lower than the coldest anticipated night, and use liners to dial in warmth. Your winter site setup requires a solid base layer that wicks sweat away from the skin, as lots of us cool down more from damp clothes than cold air.
Opt for heaters with obvious safety mechanisms. Check for auto shutoff if they tip, lose airflow, or become unsafe. For any combustion heater used in tents, trailers, or enclosed shelters, add carbon monoxide detectors and observe ventilation regulations. Maintain safe distances from flammable walls, bedding, or stacked gear, and don’t combine cook stoves and sleeping areas. Cooking should have its own vented area so fumes and spills don’t linger near sleeping areas.
Insulation is the easiest way to reduce fuel consumption. Put floor insulation under tents and trailers, block door and window drafts, and employ thermal curtains or blanket walls in bigger temporary housing. Winter camp style setups with raised sleeping benches and thick pads break the cold bridge from floor to body, which conserves heater run time and enhances sleep. Handled properly, insulation allows you to stay cozy with smaller heaters and safer, cooler heat settings.
Measure and monitor indoor temperature in occupied areas. Place simple thermometers in obvious locations and keep a basic log, at least for sleeping quarters, aid posts, and headquarters. This aids compliance with worksite regulations and helps you identify trends, such as trailers that lose heat quickly or tents that hold too much moisture and require improved ventilation.
5. Fuel Management
Fuel issues close down winter sites sooner than anything. Keep diesel, gasoline, and heating fuel in insulated, weather-protected tanks with secondary containment to capture any leaks. For very cold areas, utilize winter-grade fuels or additives to prevent gelling and protect valves and lines from drifting snow. Store fuel separate from open flames, generators, and cook stove areas and always downwind of sleeping tents, quinzhees, and common shelters to minimize fumes and fire hazard.
Create an easy refuel cadence. Schedule daily or even shift-based checks on tank levels for generators and heaters, and fill before critical lows, not once the alarms start sounding or there is a shutdown incident. During extended cold snaps, include additional runs so that night shifts do not inherit low levels. Connect this schedule to your overall operations plan, including light tower usage, max heating times, and heavy equipment cycles.
Keep fuel usage tracked with either a brief log or a digital tool. Log what feeds each generator, heater, and even car and measure against projected run time. Patterns in the data indicate whether a unit is operating inefficiently, if fuel is threatened by contamination, or if demand is increasing due to colder temperatures or additional trailers. Better forecasts translate into fewer last-minute emergency deliveries, lower cost, and a more stable operation.
Everybody who deals with fuel should know safe practice. Train staff on basic handling rules, how to use spill kits, where fire extinguishers are, and who to call in the event of a leak. Ensure this training includes night shift crews, contractors, and any workers in proximity to cook areas or first aid locations. About Your Critical Winter Site Setup.
Powering Through The Cold
Power in winter isn’t just comfort. It’s about powering through the cold, helping to keep a site safe and able to work when storms, ice, and wind begin to press at every vulnerable spot.
Choose generators with cold-weather kits and block heaters for reliable starts.
For projects involving well testing or temporary production, properly sized flare stack systems help safely manage gas while supporting reliable site operations.
Cold makes engines hard to start and strains batteries to their max. A generator that runs fine in mild weather may quit after a single night at -10 °C. Cold-weather kits add things such as battery warmers, oil pan heaters, and improved enclosures, so the unit maintains sufficient heat to start on demand. Block heaters warm the engine coolant, so the oil flows earlier, which reduces wear and minimizes starter burnout. Whether for a remote site or a small home backup unit, this can be what separates a short outage from an extended shutdown. This is important because the majority of cold-season power outages occur as winter storms deliver freezing rain, sleet, and high winds that harm power lines and equipment. When the grid is down in that kind of weather, a generator that starts on the first try is no bonus. That’s the plan.
Daily checks keep little things from becoming full outages. A fast walk-around each shift to check for leaks, low fuel, loose cables, ice build-up or blocked vents can prevent a shutdown before it begins. At a house, that inspection can be as easy as ensuring vents are unobstructed, heaters have room, and the main panel is dry. Space heaters are handy as spot heat for guard huts or small offices, but they need care. Use models with tip-over protection and auto shut-off, keep them at least 1 meter away from flammable items, and plug them straight into a wall outlet, not a power strip.
Spare parts and fluids reduce downtime when cold strain starts to appear. Things like fuel and air filters, spare fuses, belts, and the appropriate engine oil for low temperatures are important. Thinner oil rated for winter assists cold starts. The wrong grade can make a starter struggle to turn the engine. On site, it’s handy to stock fuel line de-icer, extra coolant rated for the lowest temperature you expect to encounter, and a tested set of jumper cables. For buildings, keep additional weatherstripping, caulk, and plastic film for windows around. This enables swift repairs when you discover a draft or wet spot near a frame post-storm. All of this makes for a more efficient house and a happier alligator.
Rotating spare equipment into service keeps it from freezing up. Engines and moving parts that sit still, exposed to the cold, for months can rust, hoses can develop flat spots, and valves can stick. A basic schedule that every generator, pump, or blower runs under real load for at least 30 to 60 minutes once every few weeks goes a long way toward keeping fluids moving and pinpointing problems early. The same holds true at home. If you have a backup heater or an unused room with a radiator, test it before deep winter. While you handle gear, consider how you energize and contain heat in the area. Wear layers, make use of heavy blankets, and shut doors to unoccupied rooms so that one room remains warm with minimal effort. Tap into the sun’s free heat by leaving curtains and blinds open on the sunny side of your home during the day, then shutting them at night to trap warmth. Fine-tune the primary heating system by dropping the set point a few degrees, which reduces fuel consumption but still keeps rooms comfortable, and schedule annual inspections on the boiler or furnace to detect premature wear. In a power cut, be aware that food in a fully stocked freezer can remain frozen for approximately 24 to 36 hours with the door closed, saving you generator fuel. You can also shed base demand by unplugging chargers, idle tools, and unused gear to reduce standby power draw, leaving more overhead for what you have to keep on.
Protecting Your People
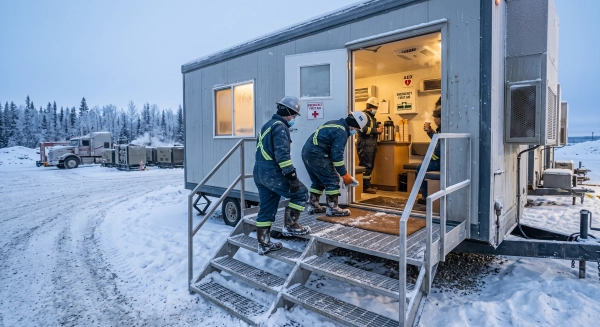
Implement mandatory insulated PPE and winter gear for your workers. That means insulated, waterproof boots with slip-resistant soles, thermal socks and layered clothing that can remain dry in snow or freezing rain. Add insulated gloves that still grip tools, and liners for colder areas. Hard hats require winter liners or balaclavas that don’t obstruct vision or hearing. Bright outer shells with reflective stripes make operators and drivers aware of people in dark, snowy light. State it explicitly in site rules, pre-shift briefings, and contractor agreements, and reinforce it with spot checks. Have extra equipment on location for wrecked or soaked clothing so workers don’t sit in wet clothes to get the job done.
Prepare heated shelters and warm-up breaks for cold stress injuries. Utilize enclosed trailers, modular cabins, or tents with safe space heaters and adequate ventilation. Locate shelters near the work areas so they will be used, not at the periphery of the site. Stock them with warm drinks, dry gloves, spare hats, and basic snacks. Schedule hard fixed warm-up breaks according to temperature, wind, and work intensity, and inscribe these into shift plans, not as discretionary rests. Prepare supervisors to detect the initial signs of hypothermia and frostbite, such as shivering, slurred speech, clumsy movement, or pale skin, and to act immediately, not after the next assignment.
Light pathways and work areas to prevent slips, trips, and falls. Employ flood and tower lights to illuminate high-traffic walkways, staircases, entrances, and loading docks. Add low-level lighting for scaffolds and within buildings. Verify that light does not glare equipment operators or cause deep shadows. Couple lighting with well-defined snow and ice removal schedules, grit or sand on ramps, and delineated walk paths that separate people from moving vehicles.
- Run winter hazard briefings before the season starts
- Train workers to recognize and report frostbite, hypothermia, and exhaustion.
- Walk the site to highlight actual winter risk examples.
- Response steps for slips, falls and cold stress cases
- Assess the situation immediately to ensure safety.
- Provide first aid if necessary.
- Report the incident to a supervisor.
- Document the details of the incident.
- Investigate the cause of the incident.
- Implement measures to prevent future occurrences.
- Go over radio and phone contact procedures during storms or low visibility.
- CLEARLY DEFINE WHEN TO STOP OUTDOOR WORK DUE TO WIND, ICE OR LOW TEMPERATURE
- Conduct short refreshers following big weather events or near misses.
The Bundled Rental Advantage
Bundled rental means renting your essential winter site gear from one centralized source rather than patch-working a bunch of small vendors. More often, it includes heating units, insulated tents or modular buildings, power distribution, lighting, safety railings, temporary walkways, and even toilets and storage. This configuration keeps the winter site plan consolidated in a single location, which prevents teams from experiencing gaps or overlap when the weather turns quick.
Getting all your winter gear from one source eliminates the majority of the back-and-forth that multiple vendors bring. One company may size heaters to the tent surface area and tent ceiling height, select fuel types to comply with local regulations, and size power cables and panels to load requirements. Take a site, for instance, that rents a heated break room, diesel heaters, fuel tanks, and power cables from one vendor that already verified that every plug, cable size, and air flow rate is compatible. This minimizes on-site fixes such as a heater that shows up with the wrong connector or a panel that cannot handle peak load on a freezing morning.
A bundled rental cuts down on the administrative burden. Rather than five or six contracts, your site team handles one master agreement for equipment, delivery, service, and pickup. Billing is in one invoice, typically with transparent breakouts for rental, fuel, labor, and damage. A project manager can reconcile those lines against the budget code in a single pass, rather than chasing tiny invoices from multiple vendors in three currencies or various tax formulations. This assists when audits or internal reviews occur down the line, because all winter expenditures reside in a single bundle of files.
| Package type | Main items included | Typical benefits | Example monthly price (EUR) |
|---|---|---|---|
| Basic winter bundle | Heaters, fuel tanks, basic lighting | Keeps crew warm, low admin, simple setup | 4,000–7,000 |
| Standard site bundle | Heated tent, power distro, lighting, safety rails | Better comfort, safer walkways, cleaner cables | 8,000–15,000 |
| Full winter compound | Multiple heated units, toilets, storage, backup | One-stop site village, single contact, full support | 18,000–35,000 |
Streamlined delivery and delivery coordination adds a whole new level to the value bundle. These boys and girls are familiar; the same hands know which board drops first, so they locate power distribution where heaters, cabins, and lights can plug in without long cable runs across access trails. In snow and ice-prone cold climates, the rental company can design raised platforms, drip trays, and fuel lines so that nothing freezes up or jams doorways. Tech support is usually faster and more specialized. One service team handles heaters, panels, and sensors, so when a fault alarm appears at 02:00, they already know the full layout and can guide on-site staff or send the right spare parts in one trip. This results in reduced downtime and increased comfort for the crew who live and breathe at the site all winter.
Proactive Winter Maintenance
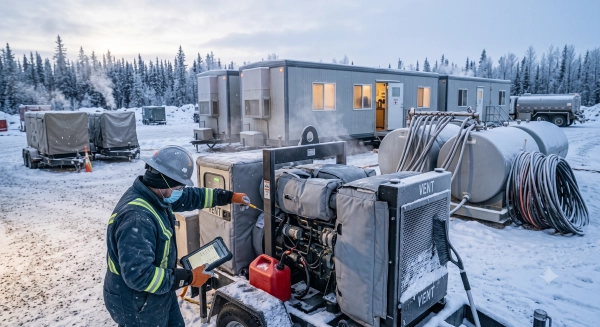
Proactive winter maintenance means doing the work before things break, not afterwards. It is a simple idea: set clear routines, track what happens, and react fast when the weather shifts. That reduces downtime, decreases repair costs, and makes the site safer for employees and guests.
Book regular check ups and servicing for any equipment rented during the season. Establish regular intervals, every 7 to 14 days, in addition to rapid inspections at the beginning of each shift. Think generators, light towers, heaters, aerial lifts, and all mobile plant. Inspect hoses, cables, batteries, brakes, and safety guards. Rubber parts and plastic covers get stiff and crack in the cold, so a small tear now can become a catastrophic failure under load. Link these inspections to meteorological information you follow a few times a day, so you can whisk essential systems inside for treatment before a cold snap or blizzard hits.
Remove snow and ice from generators, trailers, and fuel tanks every day. Maintain a minimum 1 to 2 meters clear zone around air intakes, exhausts, doors, and access panels. Snow, even packed snow, can block vents and cause overheating or carbon monoxide to build up. Ice at trailer steps and fuel points is a tripping hazard, so employ a healthy balance of mechanical clearing and anti-icing measures like a pre-storm sodium chloride mix. For road and sidewalk sites, establish a route plan that prioritizes high-traffic paths, emergency access, and high-speed vehicle lanes before low-traffic storage areas.
Change filters and fluids more frequently to combat severe conditions. Cold starts are rough on engines and hydraulics. Go proactive with winter maintenance. Use winter-grade oils, check coolant strength and change fuel filters at shorter intervals if you notice waxing or slow starts. In terms of air filters, look out for fine snow dust and road grit, particularly if plows or spreaders are working in the vicinity. Sealing cracks and gaps in enclosures and buildings helps keep moisture out, so filters and fluids stay cleaner longer.
Record all maintenance to keep tabs on performance and identify recurring problems. Utilize a basic digital log or shared sheet where employees record date, time, unit ID, weather conditions, and measures taken. Connect this to your standard road inspections, which in lots of winter operations occur at least every four hours, so you can change routes and priorities when ice or drifting snow materializes. Training staff on when to record, following winter safety rules, and reading weather reports brings all of this into one system that suits your site’s risks and resources.
Conclusion
To operate a secure site in an Alberta winter, equipment and behaviors both count. Cold doesn’t care about your schedule or budget. It affects power, equipment, and people alike.
Nice winter setup slashes actual danger. Heaters, power, light, and ground thaw gear help keep work on schedule. Defined first aid, warm break area, and site ingress all help keep your crew in better condition and more focused.
Wrapped-up rentals simplify life. One origin, one point of contact, less confusion, less delays. These proactive checks prevent small issues from becoming big, time-sucking delays.
Projects that require accurate production measurements can also benefit from test separator packages alongside dependable winter rental equipment to keep operations efficient year-round.
For your upcoming winter gig, hack it early. Identify your requirements, discuss with your rental partner, and secure the ideal winter site setup before the first hard freeze.
Frequently Asked Questions
What is a winter site setup and why is it important?
A winter site setup gets your jobsite ready for freezing temperatures, snow, and ice. We’re talking about heat, power, shelter, and safety. A good setup keeps crews moving, shields equipment and materials, minimizes downtime, and maintains safety compliance in harsh winter weather.
What are the essential components of a winter site setup in Alberta?
The heart of them involve things like temp heat, dependable power distribution, weather-protected work surfaces, insulated boxes, safe access routes and de-icing. Sites require adequate lighting and ventilation and emergency plans. These things keep us productive and safe in our frozen Albertan winters.
How can I keep power systems reliable in extreme cold?
Weather-rated cables, protected distribution panels and backup power. Store generators and fuel in protected, ventilated locations. Conduct periodic inspections, load testing and preventative maintenance. Thinking about peak demand and redundancies is how you avoid blacking out in sub-zero temperatures.
How does winter site setup help protect workers?
Winter set up supports worker safety with heated break areas, dry changing spaces, safe walking surfaces, and good lighting. It permits an open escape path and emergency service entrance. If our feet are warm, dry, and visible, the likelihood of accidents and cold related disease declines significantly.
What are the advantages of using bundled winter rental solutions?
Bundled rental solutions unite heat, power, enclosures and safety equipment from a single source. This minimizes coordination headaches, expedites setup, streamlines billing, and guarantees everything will work together. Pro assistance aids in design, compliance, and troubleshooting throughout the winter.
How often should I perform winter maintenance on a jobsite?
Check systems daily in inclement weather. Test heaters, generators, fuel, cords and pathways. Plan deeper preventative maintenance weekly. Predictive checks catch small problems early, reduce downtime and extend the life of rented and owned equipment.
How early should I plan my winter site setup?
Start thinking a few months before the cold season actually sets in. Planning in advance guarantees equipment availability, permits proper load calculations and meets permit or inspection timelines. A well thought out winterization strategy prevents wasting time scrambling when the cold weather hits.